How to Clean Indian Sandstone Without Ruining It
Indian sandstone is soft, thirsty and easy to damage. The pressure limits, the four month rule on new stone, and what to do about efflorescence.
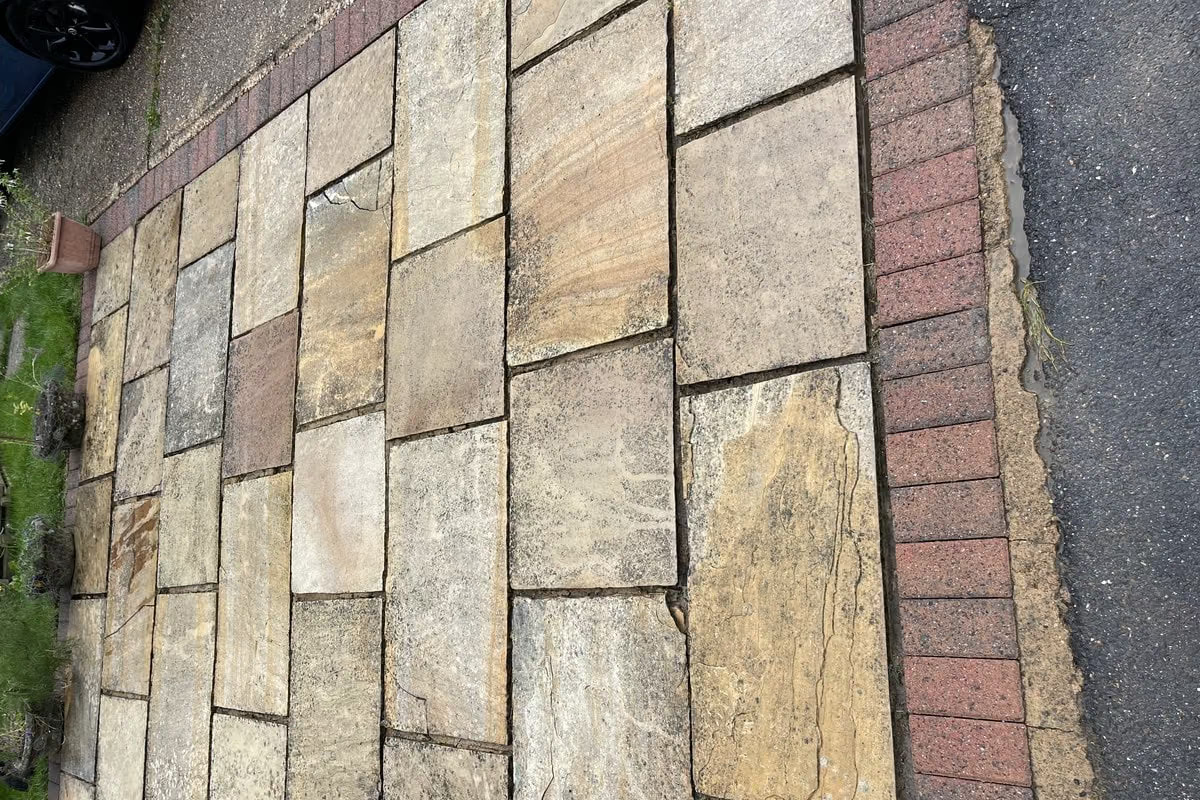
Indian sandstone is the most common natural paving in British gardens and the one I am most careful with. It is soft, it is porous, and the damage that a pressure washer does to it is permanent.
What the material is
Sandstone is a sedimentary rock: grains of quartz sand deposited in layers and cemented together over geological time by a binder, usually silica, iron oxide or clay minerals.
Two properties follow, and both matter.
The binder is softer than the grains. Erode the binder and the grains come out. That is what a jet washer does to sandstone if the pressure is too high.
It is porous. Indian sandstone typically absorbs somewhere between 1% and 6% of its weight in water, which is high compared with granite or porcelain. Water goes in, and it takes dissolved salts, algae spores and dirt with it.
The riven surface most people buy, split along a natural bedding plane rather than sawn, is more open again.
The damage, and what it looks like
Over-pressured sandstone develops a furred, open surface. Under good light you can see it as a slightly fuzzy texture, and you can often feel it, a fine roughness where the slab used to be smooth to the hand.
You will also see the pattern of the damage. Parallel arcs where a lance was swung, or bands where a surface cleaner overlapped unevenly. On a slab where part was sheltered by a planter you can compare directly.
The consequences are worse than cosmetic. A roughened surface has more surface area and more water-holding capacity, so it goes green faster from then on. Every hard clean makes the next one necessary sooner.
You cannot put it back. Sandstone does not heal and the eroded material is gone.
The right approach
Reduce the pressure. Well below what you would use on concrete. If your machine has a regulator, turn it down.
Widen the fan. 40 degrees rather than 25. Never a turbo nozzle.
Increase the standoff. 200mm and up rather than the 50mm people naturally use.
Use a surface cleaner where you can. The housing fixes the height and the jets never dwell, which removes the two most common causes of damage.
Let chemistry do the work. A cleaning solution with real dwell time removes far more organic growth than pressure does, and it removes none of your patio. On heavily grown sandstone, ten minutes of dwell is worth more than another 50 bar.
Work with the bedding, not across it. On riven stone, follow the direction of the split rather than cutting across it.
The four month rule on new stone
Do not clean natural sandstone that has been laid within the last four months.
New stone is still releasing salts from the bedding mortar and from the stone itself, and the bedding is still curing. Washing it early drives water in, dissolves more salt, and can leave a white bloom on the surface that takes a full season of weather to clear.
If your new patio has already gone patchy and white, that is efflorescence and it is normal. Leave it alone.
Efflorescence
The white powdery deposit that appears on new and newish sandstone is soluble salts brought to the surface by evaporating water and left behind.
It is not dirt. It is not mould. It is not a fault in the stone, and it is not a sign the patio was laid badly.
Jet washing barely touches it and washing hard makes it worse, because you are adding water that will dissolve more salt and bring it up as it evaporates.
It weathers off. Typically over one to two seasons, as rainfall gradually removes the salt from the system.
There are acid-based efflorescence removers. They work by dissolving the deposit and they also attack the stone, and on sandstone with a carbonate binder they can etch it visibly. I do not use them on customer patios and I would think hard before using one on my own.
Black spot lichen
The small hard black discs that will not come off.
Lichen roots into the top layer of porous stone. The visible disc is the fruiting body and there is a network below it, inside the material. Pressure sufficient to remove the disc will take the stone surface with it.
What works is a biocide and time. The lichen dies, loses its grip as it dries out, and weathers away over three to six months. It is slow and it is the only method that does not cost you stone.
Anyone offering to blast all the black spot off in an afternoon is telling you they are prepared to damage the patio.
Iron staining
Rust coloured marks that appear from within the stone rather than on it.
Indian sandstone frequently contains iron minerals, and where they sit near the surface they oxidise and bleed. It is a natural characteristic of the material rather than a defect.
It does not wash off, because it is in the stone. Some of it fades with weathering. Some of it is permanent and, honestly, a lot of people come to like it once they understand what it is.
Sealing
Sandstone is one of the surfaces where sealing genuinely earns its money, because the porosity is the root of most of the problems above.
An impregnating sealer lines the pores, so water carries less into the stone, algae has less habitat inside the surface, and stains sit on top long enough to be wiped up.
Use an impregnating sealer, not a film-forming one. A film on riven stone looks wrong and wears unevenly.
Do it in late spring or summer, on stone that is dry all the way through, with eight clear hours after application.
The short version
Lower pressure than feels necessary, a wider fan, further back, and let a cleaning solution do the work. Wait four months on new stone. Do not attack efflorescence or black spot with pressure. Consider an impregnating sealer, because on this material it addresses the actual cause.
Doing it yourself, step by step
Sandstone is the surface where I would most encourage caution, and it is still perfectly possible to do well yourself if you are patient.
Clear and sweep. Get everything off, then brush the loose material away dry. Washing dry debris just turns it into slurry you then have to chase around.
Wet the whole area first. Sandstone is thirsty. If you start washing dry stone, the first area you hit absorbs cleaning solution unevenly and you get patchy results. Wetting it through first evens the absorption out.
Apply a cleaning solution and leave it. A sodium hypochlorite-free patio cleaner or a proper biocide. Ten to fifteen minutes of dwell. Do not let it dry on the surface; on a hot day, work in sections and keep them damp.
Agitate the stubborn areas with a stiff brush. A deck brush on a pole. Ten minutes of brushing removes more organic growth than 50 extra bar ever will, and it removes none of your patio.
Rinse at reduced pressure with a wide fan. 40 degrees, 200mm plus standoff. Keep the lance moving and work in the direction of the riven split.
Rinse the whole area again with clean water. This is the step people skip, and skipping it leaves a fine grey film that dries back onto the stone and makes the patio look flat.
Re-sand the joints if they are sand-filled. Wait until the surface is dry, then brush kiln-dried sand in.
If at any point you can see the stone changing texture where you are working, stop and increase the standoff.
The stains and what each one is
Green or black film across the whole surface. Algae and cyanobacteria. Comes off with cleaning and a biocide.
Hard black discs. Black spot lichen. Rooted in. Biocide and several months, as above.
White powdery bloom. Efflorescence. Leave it.
Rust or orange marks emerging from within a slab. Iron minerals in the stone oxidising. Natural, permanent, not a fault.
Brown leaf-shaped marks. Tannin staining from wet leaves. Lightens considerably with cleaning, rarely disappears entirely on pale stone.
Dark grey rings under where a planter stood. A combination of trapped moisture and mineral leaching from the pot. Usually fades over a season once the pot is moved and light gets to it.
A pale ring around a barbecue area. Fat and oil that has soaked in. Needs a degreaser and dwell time rather than pressure, and may only lighten.
Cement or grout smears from installation. Needs a mildly acidic cement remover, used carefully and rinsed thoroughly, and tested in a corner first because acid attacks sandstone binder.
Knowing which of those you have is most of the job. Three of them respond to cleaning, three of them are permanent characteristics of the material, and two need chemistry rather than pressure.
Tools worth having
A rotary surface cleaner attachment. The single item that most improves an amateur result, because it fixes the height and keeps the jets moving.
A 40 degree nozzle. If your machine came with a turbo nozzle, put it in a drawer and leave it there as far as sandstone is concerned.
A stiff deck brush on a long handle.
A watering can or a pump sprayer for applying solution evenly.
Kiln-dried sand, if your joints are sand-filled.
The one thing I would tell a neighbour
If your Indian sandstone patio is more than five years old and has never been sealed, the growth is getting into the stone rather than sitting on it, and no amount of cleaning is going to change how quickly it comes back.
Clean it gently, let it dry properly, and seal it with a breathable impregnating sealer in late spring. That is the sequence that changes the outcome, and it is the one that gets skipped because the cleaning alone looks so good on the day.
Get a price
Send me a couple of photos
Fixed written quote, no visit needed for most jobs, and prices you can already check on this site before you ask.
Sent
That is with me.
I read every one myself. If you sent photos I can usually come back with a fixed price the same day, or the next morning if it arrives late.